基于爬虫的简单搜索
此项目可以分为三大部分
先附上本次课设的数据和代码链接 :https://pan.baidu.com/s/1Shr0HpLWiqHEJT_fCEnvuw 密码:gf0t
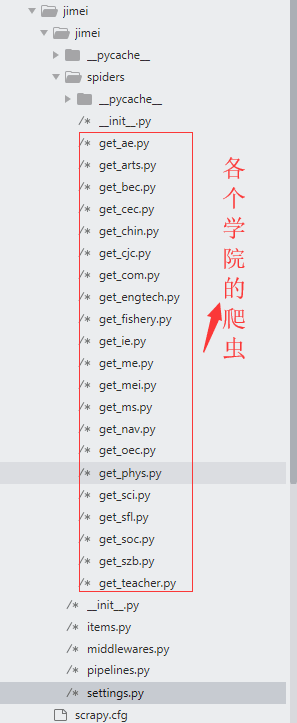
爬虫主要用主流的scrapy框架,写二十一只爬虫分别爬取各个学院的数据
首先是要在mysql中创建好数据库和表 这里表中只有url、title、content 三字字段,
1
2
3
4
5
create table cec(
url varchar(200) primary key,
title varchar(200) not null,
content varchar
);
将scrapy中爬取的数据保存在数据库中,有同步和异步写入,scrapy爬取的速度较快。当数据量大的时候同步写入,容易阻塞,这里就采用异步写入的方法
1.在settings配置文件中设置连接参数
1
2
3
4
5
6
7
8
9
10
11
12
MYSQL_HOST = 'localhost' MYSQL_USER = 'root' MYSQL_PASSWORD = 'yesimysql' MYSQL_PORT = 3306 MYSQL_DBNAME = 'jimei' MYSQL_CHARSET = 'utf8'
2.在iterms.py 定义Item类
1
2
3
4
5
6
7
8
9
from scrapy.item import Item, Field class JimeiItem(Item): url=Field() title=Field() content=Field()
3.在pipelines文件中声明一个pipeline类
1
2
3
4
5
6
7
8
9
10
11
12
13
14
15
16
17
18
19
20
21
22
23
24
25
26
27
28
29
30
31
32
33
34
35
36
37
38
from pymysql import cursors from twisted.enterprise import adbapi from scrapy.conf import settings from jimei.items import JimeiItem class jimeiPipeline(object): def __init__(self,db_pool): self.db_pool=db_pool @classmethod def from_settings(cls,settings): db_params=dict( host=settings['MYSQL_HOST' ], user=settings['MYSQL_USER' ], password=settings['MYSQL_PASSWORD' ], port=settings['MYSQL_PORT' ], database=settings['MYSQL_DBNAME' ], charset=settings['MYSQL_CHARSET' ], use_unicode=True, cursorclass=cursors.DictCursor) db_pool=adbapi.ConnectionPool('pymysql' ,**db_params) return cls(db_pool) def process_item(self,item,spider): query=self.db_pool.runInteraction(self.insert_into,item) query.addCallback(self.handle_error) def insert_into(self,cursor,item): sql="insert into szb (url,title,content) values ('{}','{}','{}')" .format(item['url' ],item['title' ],item['content' ]) cursor.execute(sql) def handle_error(self,failure): print (failure)
4.启用pipeline
1
2
3
ITEM_PIPELINES = { 'jimei.pipelines.jimeiPipeline' : 300, }
5.在爬虫中声明一个item实例,对各个属性进行赋值 例如本次课设中最后提取文章的标题和内容的处理
1
2
3
4
5
6
7
8
9
10
11
12
13
14
from jimei.items import JimeiItem def parse_text(self,response): selector= scrapy.Selector(response) title=selector.xpath("//title/text()" ).extract()[0] url=response.url content1=selector.css("form[name='form124904a'] *:not(style)::text" ).extract() content="" .join(content1).replace(u'\r\n' ,'' ).replace(u'\xa0' ,u'' ).replace(' ' ,'' ).replace('\' ',' ').replace(' \"',' ') item=JimeiItem() item[' url']=url item[' title']=title item[' content']=content yield item
首先到官网上下载对应系统版本的elasticsearchhttps://www.elastic.co/downloads/elasticsearch
首先把安装包下载下来并解压,然后运行 bin/elasticsearch(Mac 或 Linux)或者 bin\elasticsearch.bat (Windows) 即可启动 Elasticsearch 了。
解压压缩包至指定路径,程序启动入口 elasticsearch-6.4.0\bin\elasticsearch.bat
window下的安装,挺详细的https://www.cnblogs.com/545018520xq/articles/8972036.html
window下的安装,挺详细的https://www.cnblogs.com/youran-he/p/7381291.html
到官网下载leasticsearch对应版本的logstashhttps://www.elastic.co/downloads/logstash
1.下载后在logstash\bin目录位置使用logstash-plugin install logstash-input-jdbc 命令安装jdbc的数据连接插件
1
2
3
4
5
6
7
8
9
10
11
12
13
14
15
16
17
18
19
20
21
22
23
24
25
26
27
28
29
30
31
32
33
34
35
36
37
38
39
40
41
42
input{ jdbc { jdbc_driver_library => "mysql-connector-java-5.1.44-bin.jar" jdbc_driver_class => "com.mysql.jdbc.Driver" jdbc_connection_string => "jdbc:mysql://127.0.0.1:3306/jimei" jdbc_user => "root" jdbc_password => "yesimysql" jdbc_paging_enabled => "true" jdbc_page_size => "5000" jdbc_default_timezone =>"Asia/Shanghai" schedule => "* * * * *" statement => "select * from szb" last_run_metadata_path => "./logstash_jdbc_last_run" } } filter { json { source => "message" remove_field => ["message" ] } mutate { remove_field => "@timestamp" remove_field => "type" } } output{ elasticsearch { hosts => "127.0.0.1:9200" index => "szb" document_type => "szb" document_id => "%{url}" template_overwrite => true template => "template/logstash-ik.json" } stdout { codec => json_lines } }
3.template设置mapping
1
2
3
4
5
6
7
8
9
10
11
12
13
14
15
16
17
18
19
20
21
22
23
24
25
26
27
28
29
30
31
32
33
{ "mappings" : { "properties" : { "url" : { "type" : "keyword" }, "title" : { "norms" : false , "analyzer" : "ik_max_word" , "search_analyzer" : "ik_max_word" , "type" : "text" , "fields" : { "keyword" : { "type" : "keyword" } } }, "content" : { "norms" : false , "analyzer" : "ik_max_word" , "search_analyzer" : "ik_max_word" , "type" : "text" , "fields" : { "keyword" : { "type" : "keyword" } } } } } }
4 在logstash\bin目录命令行下运行https://www.cnblogs.com/jstarseven/p/7707499.html
参考此文章https://cuiqingcai.com/6214.html
es的查询语句实例:
1
2
3
4
5
6
7
8
9
10
11
12
13
14
15
16
17
18
19
20
21
22
23
24
25
{"query" : {"bool" : {"must" :[{"match" :{"title" :"计算" }}, {"match" :{"content" :"计算" }}]}}, "from" :1,"size" :2, "_source" : { "includes" : [ "title" , "content" ] }, "highlight" : { "pre_tags" : ["<span class='keyword'>" ], "post_tags" : ["</span>" ], "fields" : { "content" : { "type" : "plain" } } } }
http://www.scrapyd.cn/doc/140.html https://www.cnblogs.com/adc8868/default.html?page=5 https://code.ziqiangxuetang.com/django/django-install.html https://blog.csdn.net/baoshuowl/article/details/79658312 https://www.cnblogs.com/545018520xq/articles/8972036.html https://www.cnblogs.com/youran-he/p/7381291.html https://www.cnblogs.com/jstarseven/p/7707499.html
FROM :blog.cfyqy.com | Author:cfyqy


评论